 Skip to main content

Exterior Basement Waterproofing: How Membrane Systems Work
An exterior membrane system seals the foundation wall from the outside: excavation, wall prep, a bonded waterproof membrane, drainage board, and footer drain. Each layer explained.
Exterior basement waterproofing works by digging down to the footer along the foundation wall, cleaning and repairing the concrete, then applying a continuous waterproof membrane — either sheet or fluid-applied — over the entire below-grade wall. A drainage board protects the membrane and channels water down to a new footer drain. It stops water before it ever touches your wall.
Why Waterproof From the Outside
Most basement waterproofing you hear about happens inside: interior drain tile, sump pumps, wall panels. Those systems manage water after it has already entered. An exterior membrane system takes the opposite approach — it keeps water from reaching the wall in the first place. The foundation stays dry instead of merely drained.
That distinction matters in Shreveport. Our Gulf-fed rain comes in bursts: a spring storm can drop several inches in an afternoon on clay soil that barely absorbs it. Water stacks up against the foundation — hydrostatic pressure, in engineer-speak — and pushes through every crack, form tie hole, and porous patch in the concrete. An interior system catches that water and pumps it out. An exterior membrane never lets the pressure build against the wall at all, because the drainage board and footer drain carry the water away before it accumulates. It is the difference between bailing a boat and fixing the hull.
Step 1: Excavating to the Footer
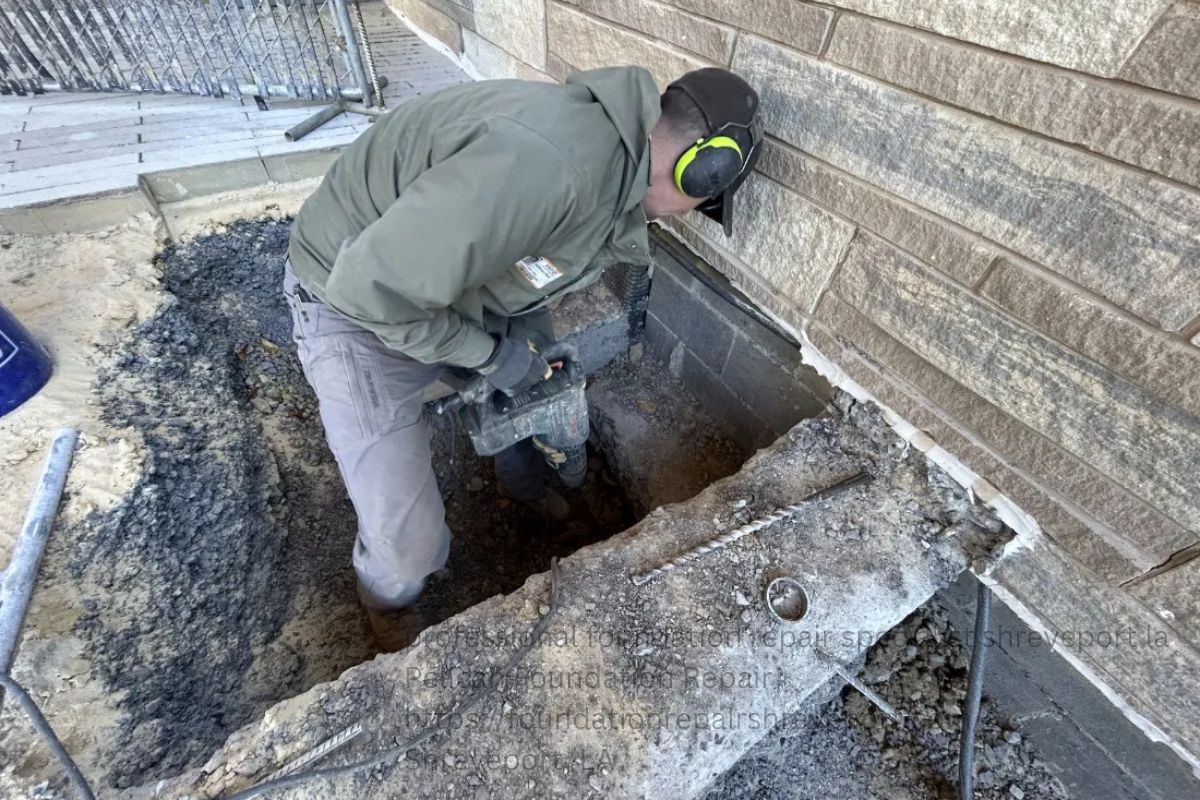
There is no way around it: exterior waterproofing starts with a big hole. An excavator digs along the foundation wall all the way down to the footer — typically eight to ten feet for a full basement, less for the partial basements and daylight walls common in North Louisiana. The trench needs to be wide enough for a person to work in, usually about three to four feet.
This is the disruptive part of the job. Anything along the foundation line comes out: shrubs, flower beds, walkways, sometimes a section of patio or driveway. A good contractor photographs everything first, protects what can be saved, and puts the hardscape back afterward. Utilities get marked through Louisiana 811 before the bucket ever touches dirt, and the excavated soil is stockpiled on tarps or hauled in stages so your yard is not buried for two weeks.
What the crew is looking at down there
The excavation is also a diagnostic opportunity. With the full wall exposed, the crew can see every crack, every honeycombed patch of bad concrete, every place the original builder’s damp-proofing (usually just a thin tar coating) has failed. In older Shreveport homes — the brick ranches of Broadmoor, the 1960s split-levels of Shreve Island — that original coating is typically long gone. What the crew finds in the trench shapes the wall prep that comes next.
Step 2: Wall Prep, the Step That Decides Everything
A membrane is only as good as the surface it bonds to. Before anything gets applied, the wall is cleaned — usually with a pressure washer — down to sound concrete. Loose material, old failed coatings, and efflorescence (that white mineral crust) all come off. Cracks get repaired properly: narrow cracks filled with hydraulic cement or epoxy, wider ones routed and patched. Form tie holes, the little circles left from construction, get plugged.
Then comes a detail most homeowners never see: the cove joint. Where the wall meets the footer, the crew installs a cant strip or fillet of mortar to create a smooth, curved transition instead of a sharp inside corner. Membranes hate sharp corners — they bridge, stretch thin, and eventually split there. That little curve is cheap insurance for the most leak-prone joint on the whole wall. Skipped prep is the number one reason exterior waterproofing fails early, and it is also the easiest corner for a contractor to cut where you cannot see it.
Step 3: The Membrane — Sheet vs Fluid-Applied
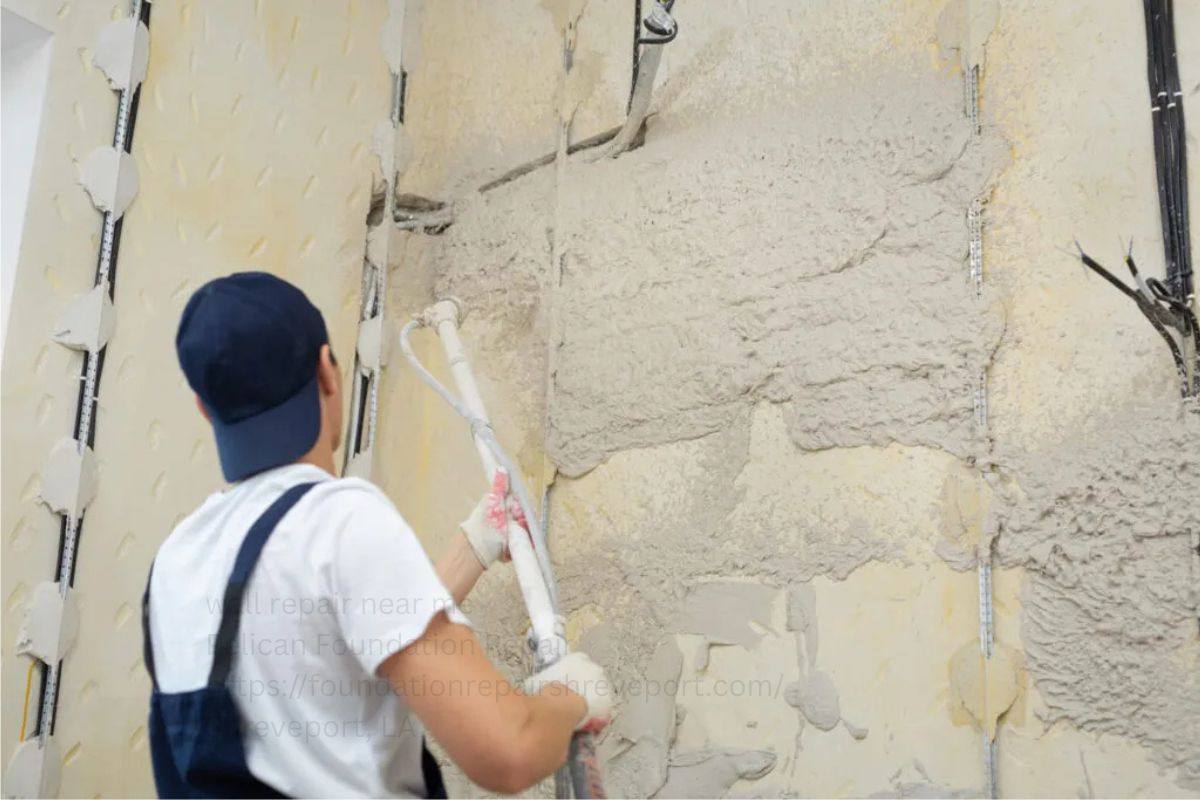
With the wall prepped, the waterproofing goes on. There are two families of exterior membrane, and a good contractor will tell you which one your wall is getting and why:
| Feature | Sheet Membrane | Fluid-Applied Membrane |
|---|---|---|
| What it is | Pre-manufactured rubberized-asphalt sheets, peel-and-stick or torched on | Liquid rubber or polymer sprayed or rolled on, curing into a seamless skin |
| Thickness control | Consistent — made in a factory to a set mil thickness | Depends on applicator skill; measured in mils as it cures |
| Seams | Overlapped and rolled seams every few feet | Seamless — one continuous coating |
| Best for | Straightforward walls where uniform thickness matters most | Irregular walls, lots of penetrations, tricky details |
| Weak point | Seam adhesion — lives or dies on installation quality | Thin spots — lives or dies on applicator consistency |
Which one suits Shreveport conditions
Honestly, either works when installed well — and either fails when installed badly. Sheet membranes give you factory-controlled thickness, which is reassuring on long, straight foundation walls. Fluid-applied systems shine on older walls with irregular surfaces, lots of pipe penetrations, and patchwork repairs, because the liquid flows into every contour and cures seamless. Many of the older homes we see in Highland and Queensborough, with their hand-poured walls and decades of patches, are better candidates for fluid-applied. Newer, straighter walls do beautifully with sheet. The deciding factor is always the wall in front of you, not the brochure.
Step 4: Drainage Board and the Footer Drain
The membrane keeps water out, but water still needs somewhere to go. That is the job of the next two layers. First, a dimpled drainage board — a rigid plastic sheet covered in little raised bumps — goes up over the membrane. The dimples create an air gap between the soil and the wall, so groundwater runs down the gap instead of pressing against the membrane. It also protects the membrane from getting gouged during backfill, when rocks and debris tumble against the wall.
At the bottom, the crew installs a new footer drain: perforated pipe bedded in washed gravel, wrapped in filter fabric, laid alongside the footer with a slight fall toward daylight or a sump. The old clay tile drains found around mid-century Shreveport homes are usually crushed or silted shut by now, so this is almost always a full replacement, not a repair. The drainage board feeds straight into this gravel bed, completing the path: wall to board to gravel to pipe to away.
Tying into drainage that actually drains
A footer drain that goes nowhere is a buried decoration. Before the trench is closed, the crew verifies the outlet: does the pipe daylight on a slope, tie into a storm system, or run to a sump pit with a pump? In flat parts of Caddo Parish, gravity daylight is not always possible, and a sump becomes part of the design. Either way, the discharge point gets confirmed while the trench is still open, because discovering a dead-end drain after backfill is an expensive lesson. Louisiana State University’s AgCenter publishes moisture and drainage guidance for Louisiana homes that backs up the same principle: control the water at the source, and give it a clear exit.
Step 5: Backfill Done Right
Backfill is where good waterproofing jobs are quietly ruined. The trench gets refilled in lifts — thin layers, each compacted — not dumped in all at once. Heavy equipment stays off the fresh fill near the wall so the membrane and drainage board are not crushed. The top foot or so is crowned slightly and graded to slope away from the house, because surface water running back toward the foundation defeats the whole system.
One detail worth insisting on: the backfill soil should be free of large rocks and construction debris against the wall. The drainage board takes the abuse, but sharp rubble grinding against it for years is asking for trouble. Clean fill, compacted in lifts, graded away from the house. Simple, unglamorous, and absolutely decisive.
When Exterior Beats Interior (and When It Does Not)
Exterior membrane waterproofing is the most complete answer, but it is also the most disruptive and the most expensive. Here is an honest breakdown of when it is the right call:
- Choose exterior when: you have chronic wall seepage through cracks and pores, the existing exterior coating has clearly failed, you are already excavating for other work, or the basement will be finished and you want the wall itself dry — not just drained.
- Choose interior when: the problem is water coming up through the floor joint or a high water table under the slab, excavation access is impossible (a zero-lot-line wall, a detached garage slab poured against the house), or the budget demands a phased approach.
- Do both when: the basement is being finished as living space in a high-water area. Belt and suspenders is legitimate engineering when drywall and flooring are at stake.
Cost-wise, exterior work typically runs several times what an interior drain system costs, because you are paying for excavation, wall prep, membrane, drainage, and restoration. What you buy with that money is the only system that keeps the wall itself dry — which matters for finished basements, for structural longevity of the concrete, and for resale in a market where buyers’ inspectors flag every damp wall they find.
What to Ask Before You Hire for Exterior Work
Because so much of this job gets buried, the contractor’s answers matter more than usual. Ask which membrane product they use and why, how they prep the wall, whether the footer drain is full replacement, where the drain discharges, and how they protect the membrane during backfill. Ask to see photos of past excavations — a contractor proud of their buried work keeps those photos handy.
To keep researching, see our basement waterproofing service page for the full menu of options, our comparison of interior vs exterior basement waterproofing, and our guide to foundation waterproofing methods for Shreveport, LA. The EPA’s moisture guidance for homes is also worth a read on why keeping walls dry matters for indoor air. And our services overview covers everything from drainage correction to structural repair under one roof. We offer free inspections Monday through Saturday, 8:00 AM to 6:00 PM.
Frequently Asked Questions
How long does exterior basement waterproofing take?
Most homes take one to two weeks: a few days of excavation, a day or two of wall prep, membrane and drainage installation, then backfill and restoration. Weather, access, and how much hardscape must come out and go back in move the timeline. A contractor who promises three days is skipping steps.
Will excavation destroy my landscaping?
The foundation line will be disturbed — there is no way to dig an eight-foot trench without it. Shrubs and beds along the wall come out; a good contractor photographs, protects, and restores them, and puts walkways and patio sections back. Plan on the planting beds needing a season to recover, and budget for some replacement plants.
What is better, sheet or fluid-applied membrane?
Both work when installed well. Sheet gives factory-controlled thickness on straight walls; fluid-applied flows seamless over irregular older walls with lots of penetrations and patches. The right choice depends on your wall’s condition, not on which product the contractor happens to stock.
Can you waterproof just one wall?
Yes, and it is common. If only the north wall leaks, many homeowners waterproof that wall and monitor the rest. The crew still excavates to the footer along that wall and ties the new drain into the existing system. Just go in knowing the other walls keep their original protection — or lack of it.
Does exterior waterproofing fix a wet basement floor too?
Not by itself. An exterior membrane stops water coming through the walls, but water rising through floor cracks or the wall-floor joint from a high water table needs interior drainage — drain tile and a sump — to manage. Many wet basements need both systems working together.
How much does exterior basement waterproofing cost in Shreveport?
It is the premium option: most full-perimeter jobs land in the tens of thousands, driven by excavation depth, linear footage, wall condition, and restoration work. Single-wall jobs cost proportionally less. Any honest quote follows an on-site look at access and wall condition, never a phone estimate.
How long does an exterior membrane last?
A properly installed membrane, protected by drainage board and correct backfill, is a decades-long solution — the materials are rated for service lives measured in decades, and they are buried away from UV and weather. Our qualifying waterproofing work carries a 20-year structural warranty. The footer drain needs its outlet kept clear, which is the only real maintenance.
Pelican Foundation Repair
6118 Fairfield Ave, Shreveport, LA 71106, USA
318-585-2003
https://foundationrepairshreveport.com/